Well monitoring doesn’t have to be difficult. And in just under two hours, you can install a solution that delivers pressure and temperature data directly to your office, thanks to satellites.
Here’s how easy it is to get started with HiberHilo.

Here’s how easy it is to get started with HiberHilo.
Well monitoring doesn’t have to be difficult. And in just under two hours, you can install a solution that delivers pressure and temperature data directly to your office, thanks to satellites.
Here’s how easy it is to get started with HiberHilo.
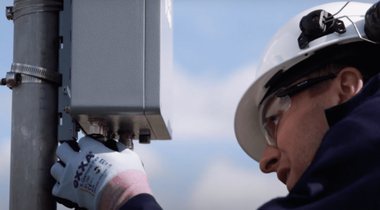
The gateway is how HiberHilo sensors connect to the satellites. It’s basically a sleek looking metal box that you bolt down somewhere on your structure. It has two antennas. One for receiving data from HiberHilo. And one for transmitting that data to space.
Hiber’s gateway is small (including the mounting, it’s 330mm x 230mm x 140mm) and lightweight (it’s only 4 kilograms, about as much as a housecat). Which makes it a perfect piece for ageing platforms or worksites where weight’s a serious concern.
After you install the gateway, you’ll have to do a LoRa check with one of the sensors before you move to installation. This is pretty easy. Just grab one of the pre-configured sensors you’re going to use, open an app on an ATEX-safe phone, and check that it’s there.
Done with the gateway and LoRa check? Good. Now it’s time to install the rest of the sensors on your wellheads.
HiberHilo sensors come pre-configured, so you don’t have to fuss around with the sensor after you pull it out of the box. Each installation only takes about ten minutes. And thanks to some helpful documentation and videos provided by Hiber, you’ll know exactly what to do. Just screw the standard half-inch NPT connection into the Christmas tree, and you’re done.
Hiber’s sensors are tough. And they’re built to last. So they can handle the salty environment of the ocean or the heat of the desert sun. And they’ll keep working for years. So when you decommission a well, you can unscrew the sensors and take them with you to the next worksite.
You’ve set up the gateway. You’ve installed the sensors. The hard part’s over. Now it’s time to confirm that the sensors are all connected to the network, and that they’re sending data to the gateway.
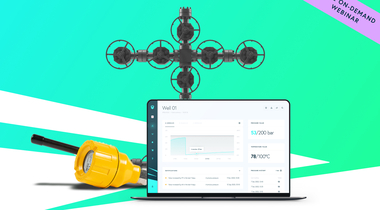
To check the connection, all you have to do is connect to the Via gateway’s WiFi hotspot with a laptop or a smartphone, then open up the dashboard. You’ll be able to see all of the sensors in one slick overview and make sure they’re sending data.
After you’ve completed the full installation checklist and confirmed the end-to-end functionality of the solution with Hiber Support, you’re done. You should see data roll into your dashboard within 15 minutes.
It’s really that easy. And it’s really that fast. On past projects we’ve installed anywhere from five to ten wells in a day. And it didn’t require a special trip. The next time you go out for a pressure manual pressure reading, you can install HiberHilo in a few minutes. And start gathering instant data on your wellhead that you can access from anywhere in the world.